Create and Deploy WordPress
This section uses the installation of WordPress as an example to demonstrate how to deploy an application in the KubeSphere web console and access it from outside the cluster. For more information on application resource management, please refer to Application Workloads.
WordPress Introduction
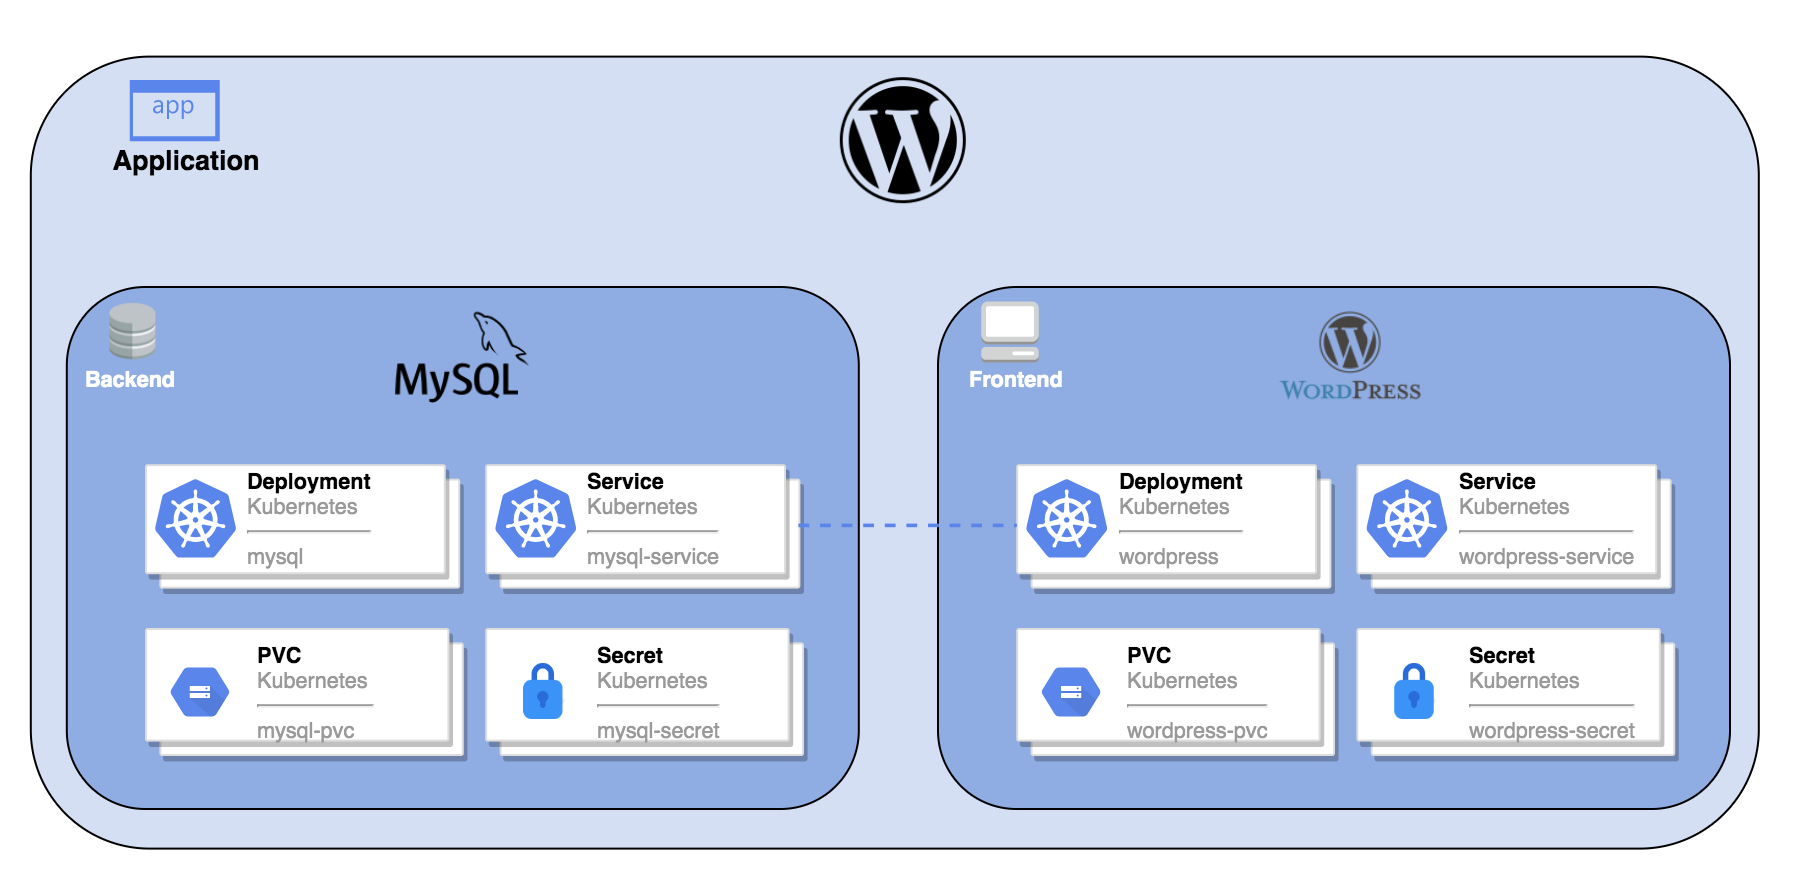
WordPress is a free, open-source content management system based on PHP. You can use WordPress to build your own website. The complete WordPress application includes the following Kubernetes objects, with MySQL serving as the backend database.
Prerequisites
-
Prepare a project (e.g., demo-project) and a user (e.g., project-regular) who has been invited to this project. This user should have the operator role in the project. For more information, please refer to Control User Permissions.
Steps
1. Create Secrets
Create two Secrets to set the root passwords for MySQL and WordPress respectively.
-
Log in to the KubeSphere web console as the project-regular user.
-
Click Workspace Management and enter the workspace where the project is located.
-
In the left navigation pane, select Configuration > Secrets.
-
Select the project demo-project from the drop-down list in the upper-left corner of the page, then click Create.
-
On the Basic Information tab, enter the basic information for the Secret (e.g., set Name to mysql-secret), then click Next.
-
On the Data Settings tab, click Add Data to add a key-value pair.
-
Set Key and Value to MYSQL_ROOT_PASSWORD and 123456 respectively, then click
 in the lower-right corner of the page to save the settings.
 -
Click Create to create the Secret, which will provide the root password for MySQL.
-
Repeat the above steps to create a Secret named wordpress-secret, setting Key and Value to WORDPRESS_DB_PASSWORD and 123456 respectively, to provide the root password for WordPress.
2. Create a PersistentVolumeClaim
Create a PersistentVolumeClaim to store WordPress application data.
-
In the left navigation pane, select Storage > PersistentVolumeClaims, then click Create on the right side of the page.
-
On the Basic Information tab, enter the basic information for the PersistentVolumeClaim (e.g., set Name to wordpress-pvc), then click Next.
-
On the Storage Settings tab, click Next.
-
On the Advanced Settings tab, click Create.
3. Create the MySQL Application
Create the MySQL application to provide database services for WordPress.
-
In the left navigation pane, select Application Workloads > Composed Apps, then click Create on the right side of the page.
-
On the Basic Information page, enter the basic information for the application (e.g., set Name to wordpress), then click Next.
-
On the Service Settings page, click Create Service to create a service for the composed app.
-
In the Create Service dialog box, click Stateful Service.
-
In the pop-up Create Stateful Service dialog box, enter the name for the stateful service (e.g., mysql) and click Next.
-
On the Pod Settings tab, click Add Container.
-
Enter mysql:5.6 in the search box, press Enter, scroll down, and click Use Default Port.
Note The configuration is not yet complete. Please do not click
in the lower-right corner at this time. -
In the Advanced Settings area of the Pod Settings tab, set the memory limit to 1000 Mi or higher; otherwise, MySQL may fail to start due to insufficient memory.
-
Scroll down to the Environment Variables area, select Environment Variable, and choose From Secret from the drop-down list. Set the parameters as follows:
-
Key: Set to MYSQL_ROOT_PASSWORD.
-
Resource: Set to mysql-secret.
-
Key in Resource: Set to MYSQL_ROOT_PASSWORD.
-
-
Click
to save the configuration, then click Next. -
On the Storage Settings tab, click Add PersistentVolumeClaim Template.
-
Enter a PVC name prefix (e.g., mysql), and specify the mount path (Mode: ReadWriteOnce, Path: /var/lib/mysql).
-
Click
to save the configuration, then click Next. -
On the Advanced Settings tab, click Create to create the MySQL application.
4. Create the WordPress Application
-
Click Create Service again. In the pop-up Create Service dialog box, click Stateless Service.
-
In the pop-up Create Stateless Service dialog box, enter the name for the stateless service (e.g., wordpress) and click Next.
-
On the Pod Settings tab, click Add Container.
-
Enter wordpress:4.8-apache in the search box, press Enter, scroll down, and click Use Default Port.
Note The configuration is not yet complete. Please do not click
in the lower-right corner at this time. -
Scroll down to the Environment Variables area, select Environment Variable. Two environment variables need to be added here. Please set them as follows:
-
In the drop-down list, select From Secret, enter the key name WORDPRESS_DB_PASSWORD, select the resource wordpress-secret and the resource value WORDPRESS_DB_PASSWORD.
-
Click Add Environment Variable, and enter the key name WORDPRESS_DB_HOST and the value mysql respectively.
Note The value of the WORDPRESS_DB_HOST environment variable must be exactly the same as the name of the MySQL stateful service created in Create the MySQL Application. Otherwise, WordPress will not be able to connect to the MySQL database.
-
-
Click
to save the configuration, then click Next. -
On the Storage Settings tab, click Mount Volume.
-
On the PersistentVolume tab, click Select PersistentVolumeClaim.
-
Select the previously created wordpress-pvc, set the mode to ReadWriteOnce, and enter the mount path /var/www/html.
-
Click
to save the configuration, then click Next. -
On the Advanced Settings tab, click Create.
-
On the Services page, click Next.
-
On the Routing Settings page, click Create to create WordPress. You can view the created application on the Composed Apps page.
5. Verify if WordPress is Created Successfully
-
In the left navigation pane, select Application Workloads > Workloads.
-
Check the running status of wordpress-v1 and mysql-v1 on the Deployments tab and the StatefulSets tab respectively. If both statuses are Running, it indicates that WordPress has been created successfully.
6. Access WordPress via NodePort
-
In the left navigation pane, select Application Workloads > Services.
-
Click
 on the right side of
 wordpressand select Edit External Access. -
Select NodePort in Access Mode, then click OK.
-
Click wordpress to enter its details page. On the Resource Status tab, in the Ports area, you can view the exposed node port.
-
Enter
<Node IP>:<Node Port>in a browser to access WordPress from outside the cluster, as shown in the following figure.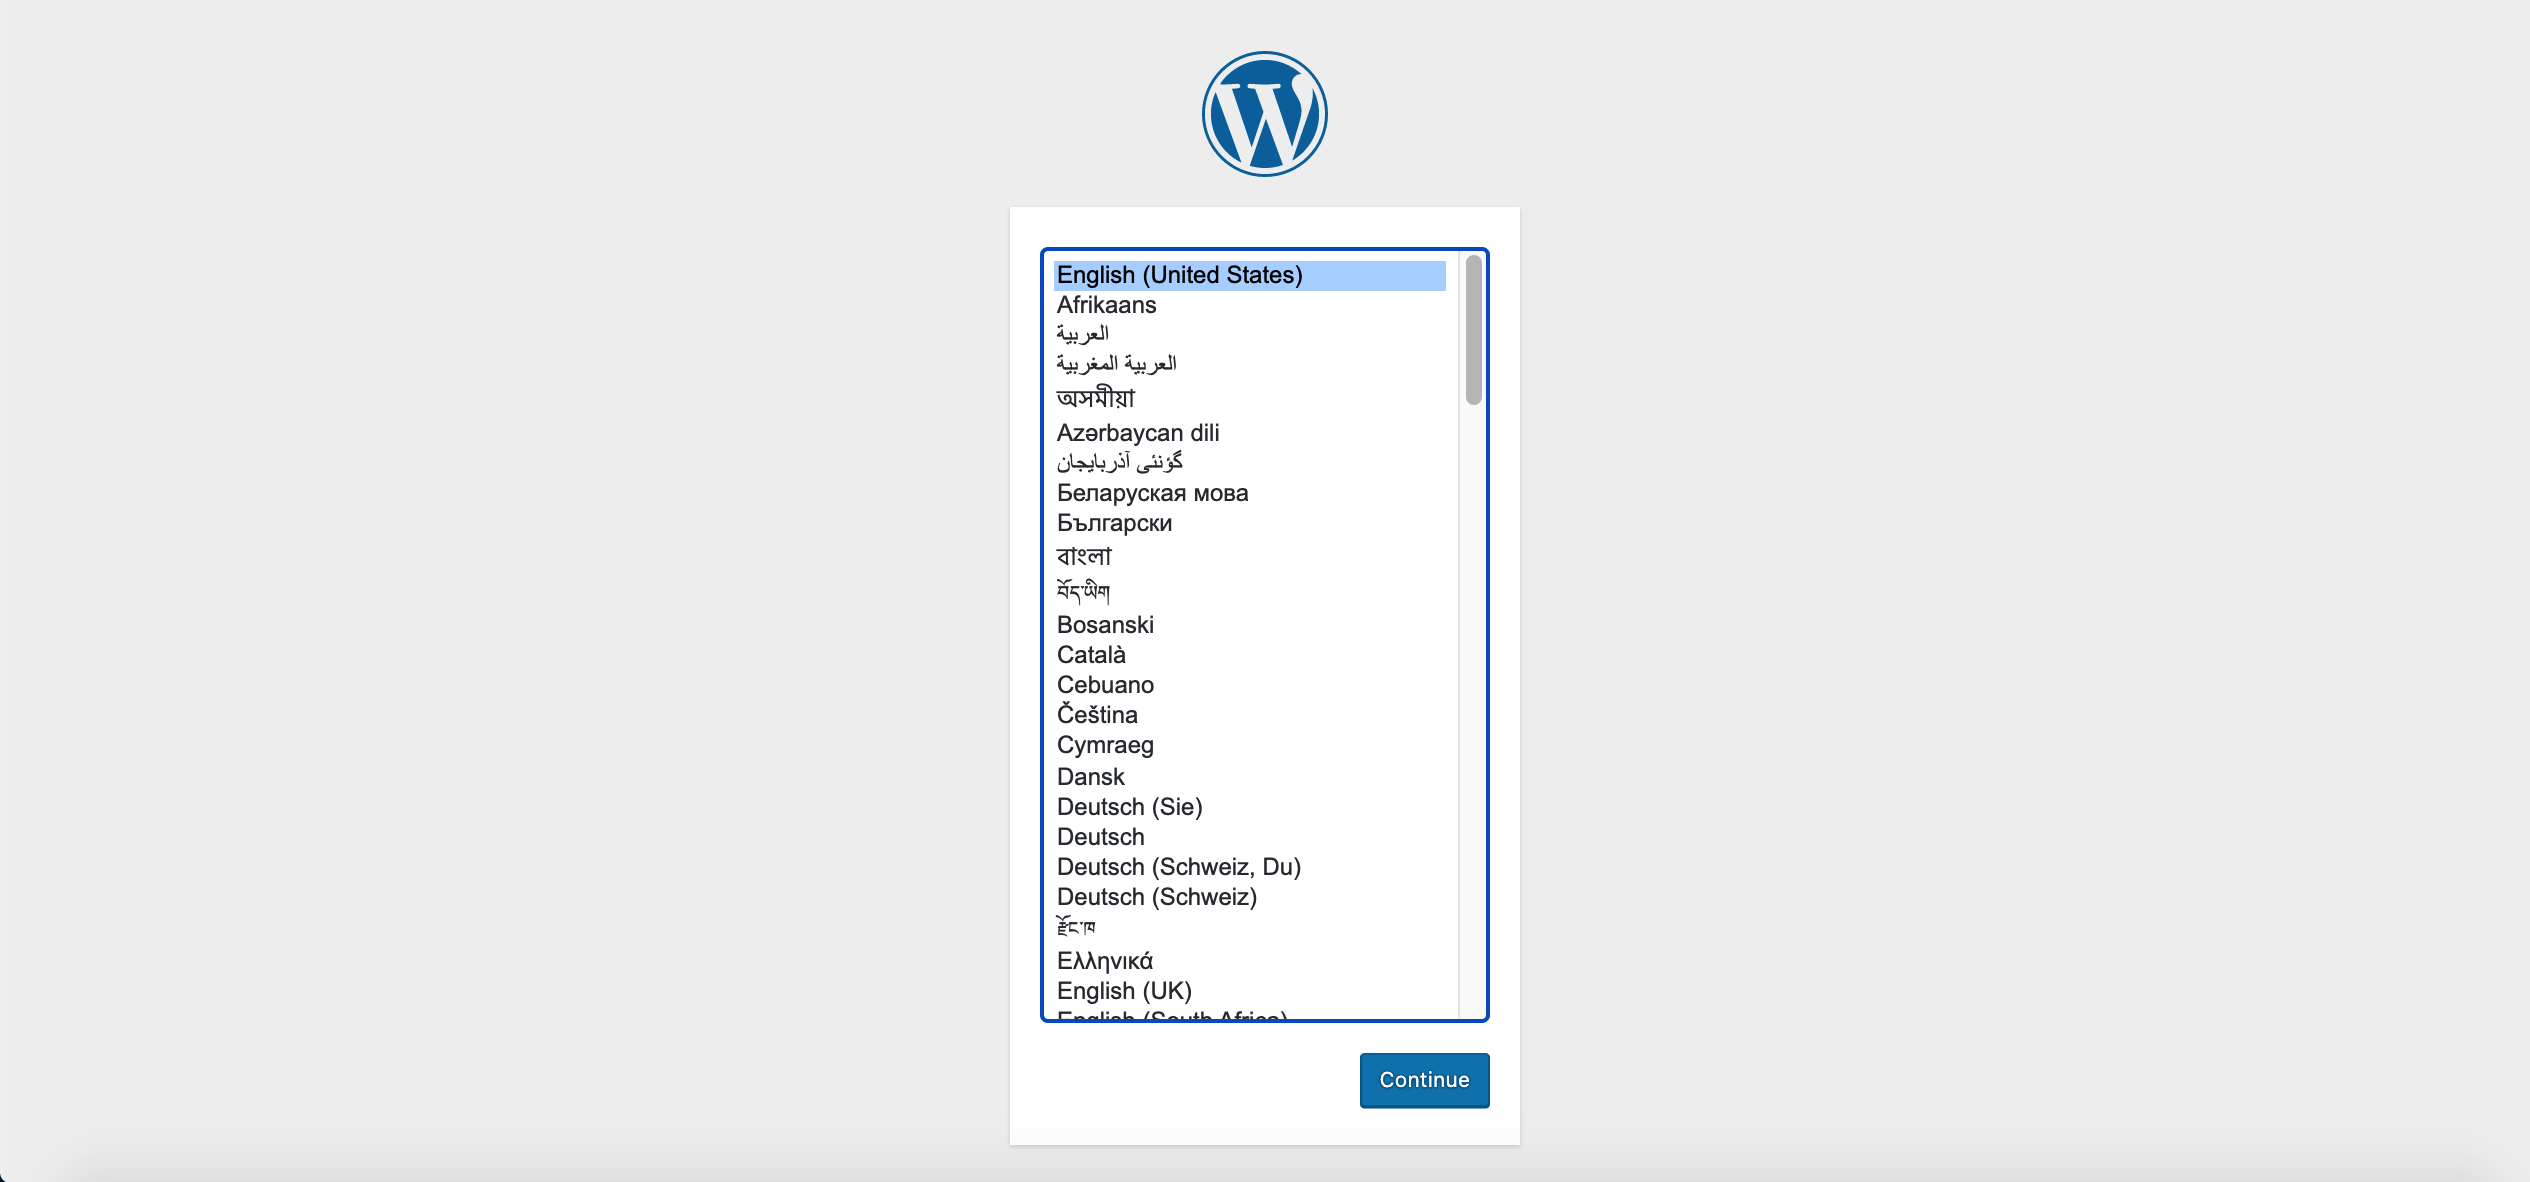
Note Depending on your Kubernetes cluster deployment environment, you may need to open the port in the security group and configure related port forwarding rules.